Upgrading a manual installation
This page concerns phpList self-hosted users only. If you have a registered account at the phpList Hosted service, please contact hosted@phpList.com.
You should upgrade your phpList installation frequently. By keeping up-to-date you can take advantage of the latest features in phpList which will make your work easier and help you advance your work.
Often, a new version will include security updates which are important to protect your data and the personal details of your subscribers.
Upgrading from phpList 2 (orange) to 3 (grey) works well - if you are still using phpList 2 please upgrade as soon as soon you can.
Overview
If you installed phpList manually, this is the correct installation method for you. The process consists of the following steps:
- Download the archive containing the new version to your server (e.g. to your home directory)
- Decompress the files
- Back up your database using your preferred method (e.g. using Mysqldump)
- Copy your config.php file
- Remove your old `lists` directory and replace it with the new one
- Copy your backed-up `config.php` file over the default one in the new `lists/config/` folder
- Login to the phpList admin interface and automatically upgrade the database following the prompt
When to update
You can sign up for email notification about new versions of phpList by subscribing to our announcements list.
When normal configuration/settings have been maintained, phpList will check for updates every 7 days. You can adjust the frequency of checks on the Config > Settings page, accessed via the main menu.
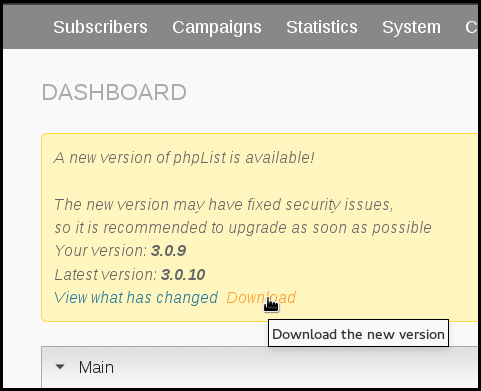
When a new version had been released you will receive a notice on your dashboard.
If you see a notification saying "A new version of phpList is available!" then it's time to upgrade.
Downloading the new version
From your Dashboard notification, click Download.
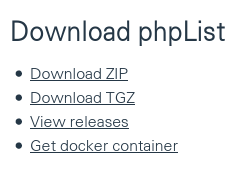
This will take you to www.phplist.org/download-phplist/, where you click DOWNLOAD ZIP or DOWNLOAD TGZ.
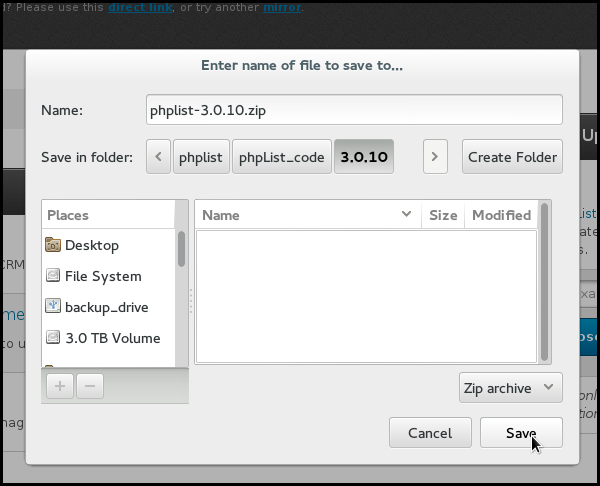
You will be redirected to SourceForge, where your download will start after a few seconds.
Choose a place on your computer to store the file and click Save (your own operating system/browser may work differently).
Unzipping phpList
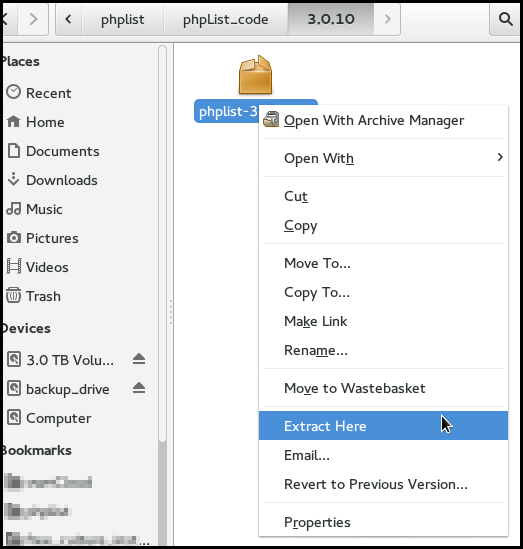
Once you have downloaded phpList to your computer, unzip it. You can usually do this by right clicking and choosing Extract Here (Linux, as in screenshot), double clicking the folder (mac) or right click "extract all" (windows).
Next you must back up your installation, this is a vital step as it will keep your data safe is anything goes wrong with the upgrade process.
Back up your database
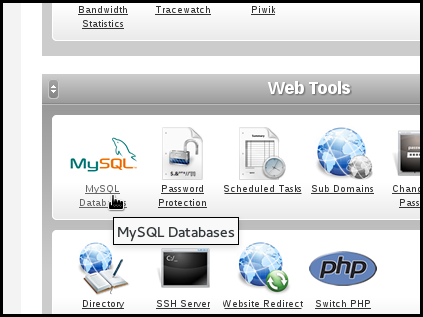
The method of doing this will depend on your hosting provider. In this example we use cpanel. Click on the MySQL Databases icon.
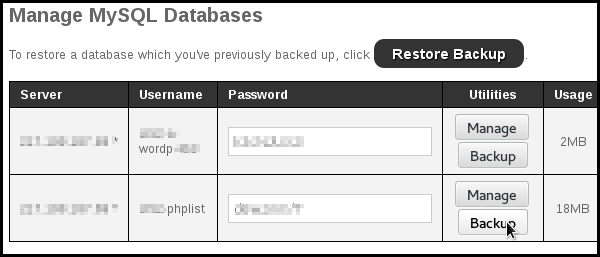
Locate your phpList database and click Backup.
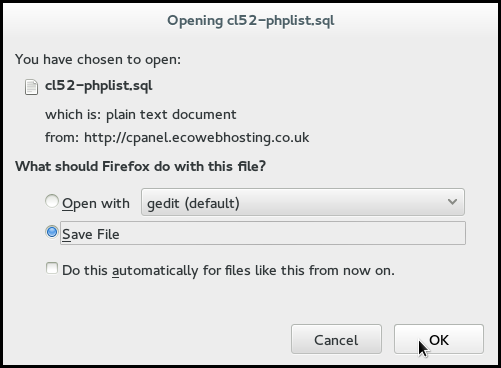
Choose to Save File and click OK.
Choose a location on your computer to save your database too, and click Save.

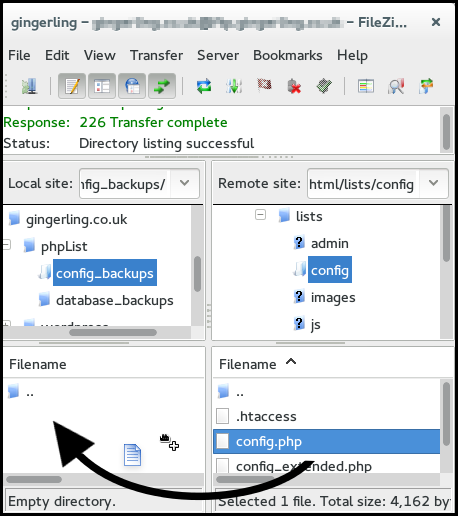
Backing up your config.php
You also need to back up your config.php., which is usually located at public_html/lists/config/config.php on your server. You will need this file again later.
You can do this using an FTP client. In the screenshot below we used Filezilla and the config.php file was simply dragged and dropped onto into the backup folder.
If you have customized/altered any other files for some non-standard scenario you should back them up too.
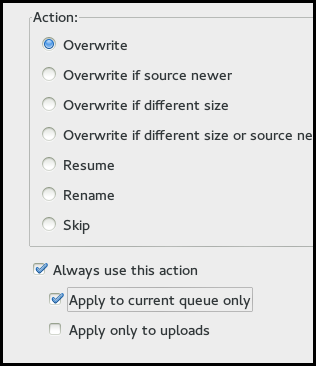
Upload the new version
Next, you need to upload the new version files to replace the files from the previous version. You can do this using an FTP client. This is similar to installing for the first time. In the screenshots below we used Filezilla.
First, we selected all the files within the public_html/lists folder on our pc, then we uploaded them to the public_html/lists folder on our server.
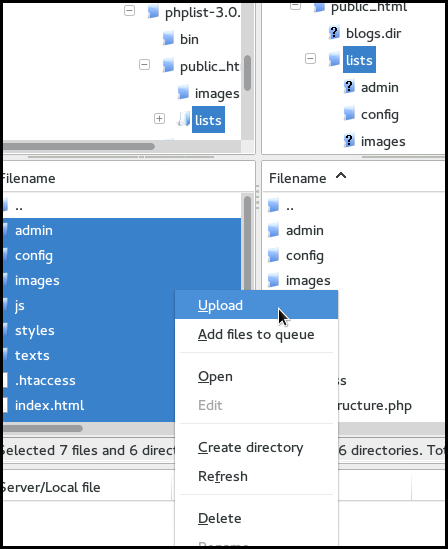
You need chose to overwrite all files.
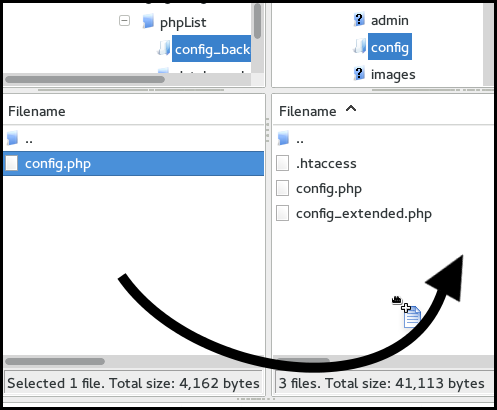
Replace new config.php with your own
Now you need to replace the new config.php file with the one you backed-up earlier, which has your system details already set up.
We did this using an ftp client.
Update your database
Finally, log in to your installation (http://yourdomain.com/lists/admin).
You will see a big red box at the top of the screen telling you to upgrade your database. Click Upgrade.
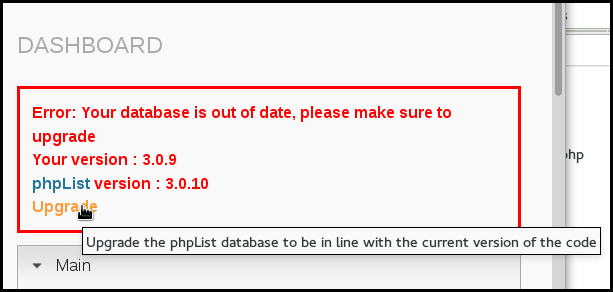
Read the text, and click Upgrade.
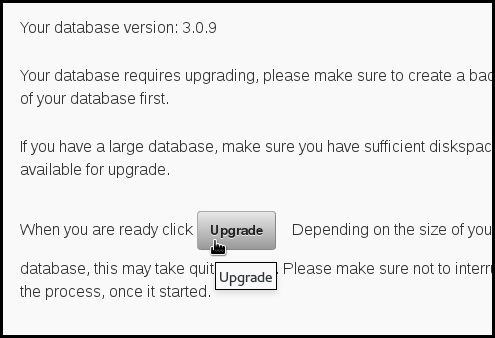
You will see a progress bar, and when the process has finished you will be told that you have successfully upgraded.

Feedback
Discuss this chapter here.