Designing and assessing your campaigns
- Templates
- The footer
- Creating a template
- Advanced templating
- DIY: Super Simple Template
- Subscribe page design and configuration
- Advanced Campaign Statistics
Templates
The templating system in phpList is designed to create a workflow that keeps things simple for the campaign creator.
The Templating Workflow in phpList
There are two elements to the workflow:
- Creating and uploading a template; this is done very rarely
- Choosing and using the template; this is done for every campaign
Step one is the more complex and it is often done by a web designer or system administrator. We cover this in the creating a template chapter. There is also a really easy templates chapter to help you if you do not have a designer.
The second part of the workflow is very simple. The person creating the campaign simply selects the template by name from a drop down menu after the campaign message has been written.
The template is then applied during sending, like a wrapper around the text, and the person sending the campaign does not come into contact with the template code at all.
The template is not applied to emails sent to subscribers who request a plain text email.
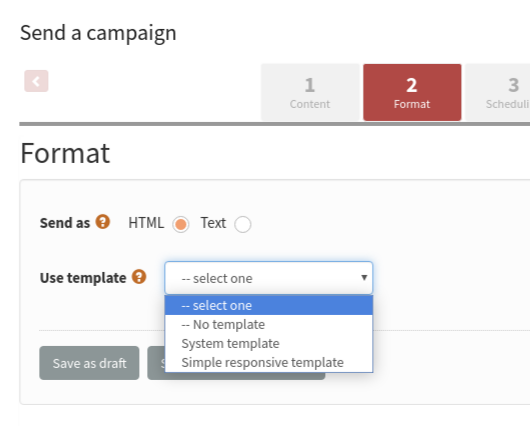
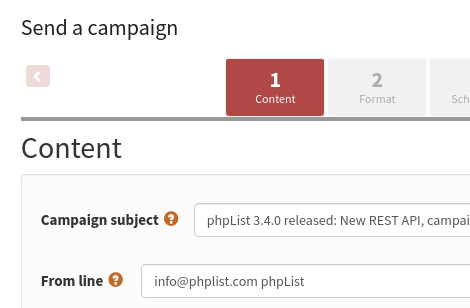
The very first step is to create your campaign and add content. Go to Campaigns > Send a campaign and add your content. The second step is to add a template for your campaign. You can choose between the default templates or choose one you have uploaded yourself. To do that click the Format button next to the Content button.
Send test
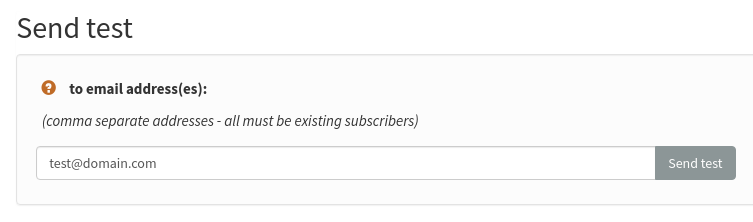
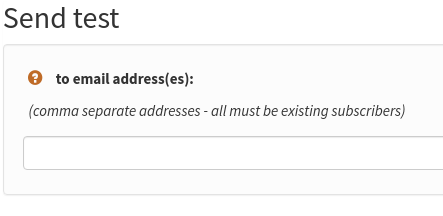
In order to be 100% sure that the final result of your campaign will look as you wish for your subscribes, it is recommended you send a test campaign to yourself. On the bottom of your page you will find the "Send test" field. You can send a test campaign to more than one email addresses.
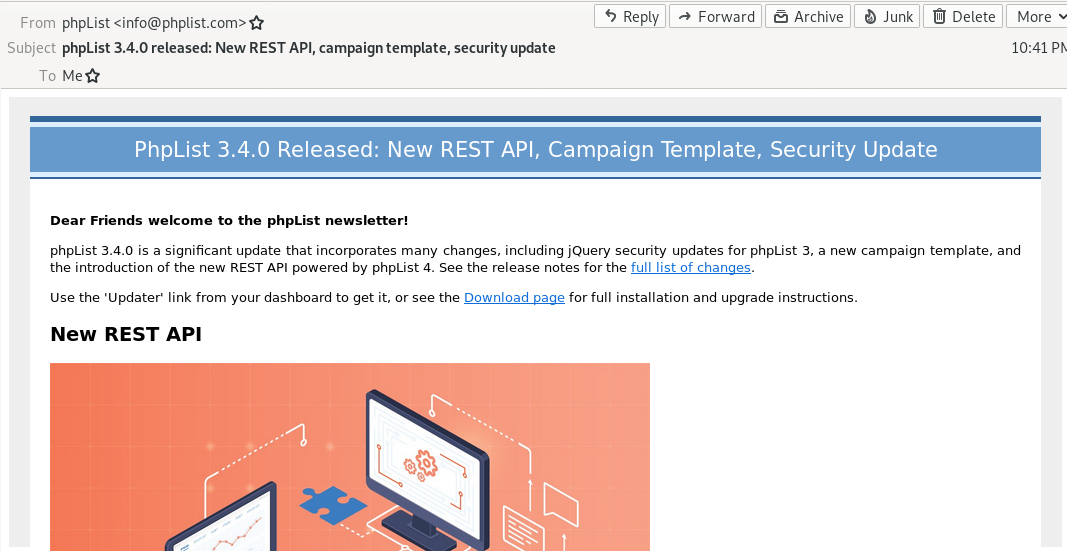
 On the email you will receive you will notice that your campaign is wrapped by the template. If you are happy with its look, you can proceed with sending the campaign.
Feedback
Discuss this chapter here.
The footer
- Is an active feature of the software, not simply a description of a design element
- Can be edited for each campaign from the content tab of the campaign workflow
- Is replaced by a secondary footer when the Forward to a Friend system is used
- Should contain the [UNSUBSCRIBE] placeholder
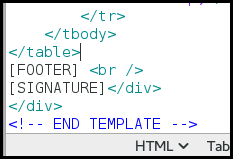
- Is placed in the template with the [FOOTER] placeholder
What is the footer?
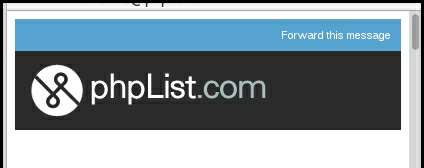
In your template design you may have many elements which you think of as being "the footer." In the image below, for example, the blue and black colored areas and all the content within them would commonly be described as the "footer."
However, you may not wish to add all of this into your phpList footer. For example, in the image below only the "update your preferences" and "unsubscribe" elements are within the phpList footer system. The rest is in the template itself.

You may wish to choose which items go into the phpList footer carefully because:
Adding your footer
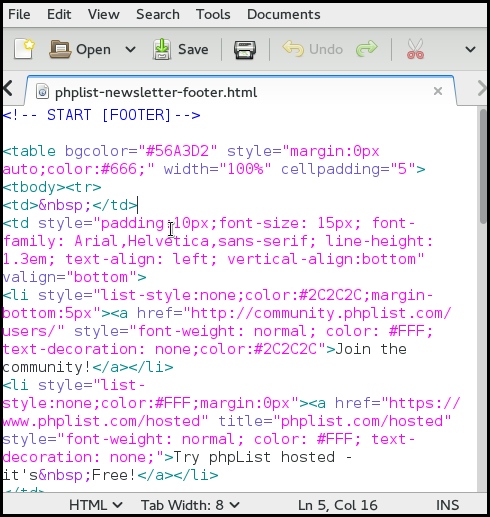
Everything that goes in the phpList footer is added separately from the rest of the template. To situate the a footer to your template use the [FOOTER] placeholder.
You should design your footer as a separate .html file

As well as in your campaigns when you send them.
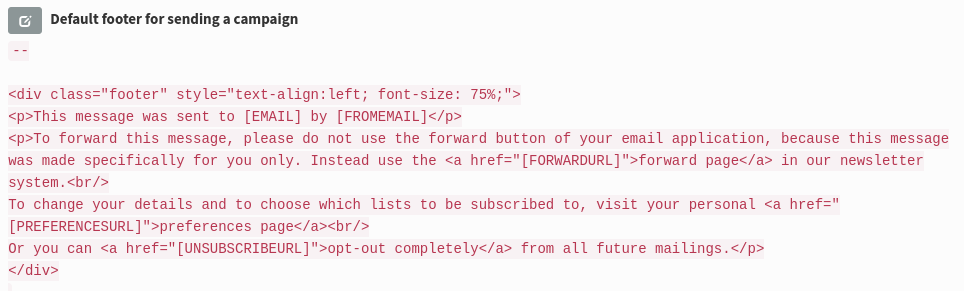
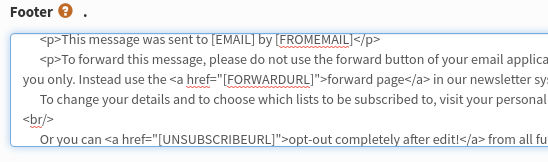
The Forward to Friend footerOn the Config > Settings page, there is a second footer called Footer used when a message has been forwarded.
If you use the [FORWARD] placeholder, and a subscriber forwards the email, this footer will replace the usual one. It contains the following text:
This message has been forwarded to you by [FORWARDEDBY].
You have not been automatically subscribed to this newsletter.
If you think this newsletter may interest you, you can [SUBSCRIBEURL] and you will receive our next newsletter directly to your inbox.
If you wish to use the forward to friend system you should edit this footer so that it has the correct appearance while maintaining the appropriate text.
Feedback
Discuss this chapter here.
Creating a template
Creating your template
There are lots of ways to create your template. You could
- Design and write your own
- Pay someone to do this for you
- Modify a generic/Open Source template that you have bought or "recycled"
- Use the super-simple DIY template in the next chapter.
Here are some tips to help you set up your template for use with phpList.
If you don't understand the information in this chapter and you don't have anyone to help you with your template, then skip to the next chapter for a super simple template.
The Basics
You should use inline styles, and unless you have configured phpList especially with a plugin, you must use a single column template.
If you choose a responsive template, your campaign editor should not use images with a width larger than a smartphone screen (max 320 by 480 pixels).
Logo: upload or remote link?
When you are designing or modifying your template, you need to decide if you will include your logo in the campaigns as an attachment or use a remote image. If you include your logo as an attachment it will always display to the recipient.

If you use a remote link, however, the image will only display when the subscriber gives permission (in most email and webmail clients).
If you decide you upload your image then leave the local link (or just a use a "broken link") and you will be prompted to upload the image when you are adding your template to phpList.
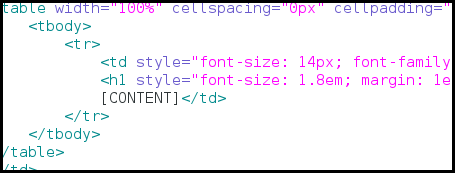
A mandatory placeholder in the body
You must include some strings that phpList will replace during the sending stage.
[CONTENT]
The obligatory string is [CONTENT]. This will be replaced with the content of your message when you send your campaign.

Adding your template to phpList
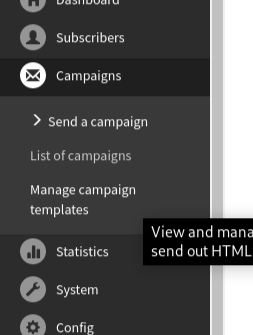
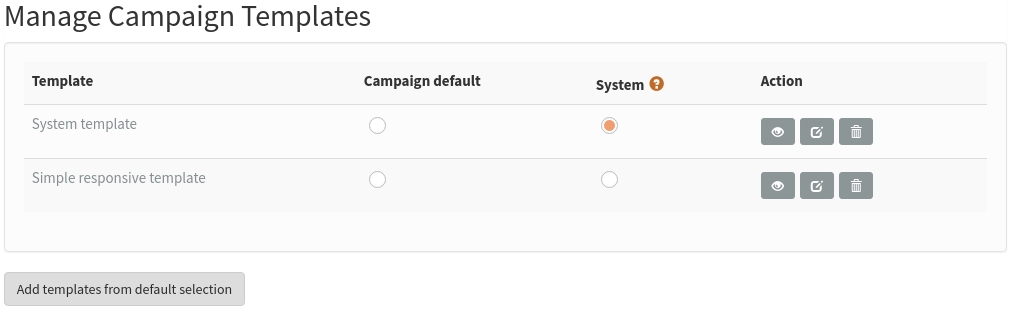
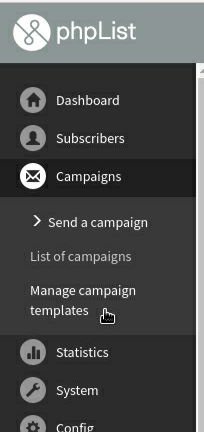
To add a template to phpList, go to Campaigns > Manage campaign templates from the main menu.
You will then see a list of templates already in the system. By default there is one template, the System template (which styles things like the confirm subscription emails).

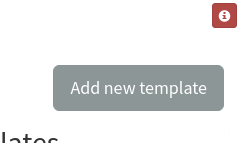
Click Add new template.
 Name your template
First, give your template a Title. This will display in the list of templates to choose from during the campaign composition stage, so it is important that the name makes sense to the person writing the campaigns.
In this case we called the template Simple responsive template, because it is the template we use when we announce a new version of phpList. We have different templates for community news and phpList hosted special offers, for example.
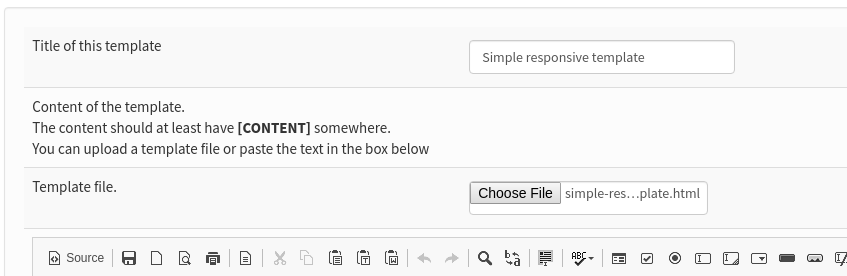
Upload your file
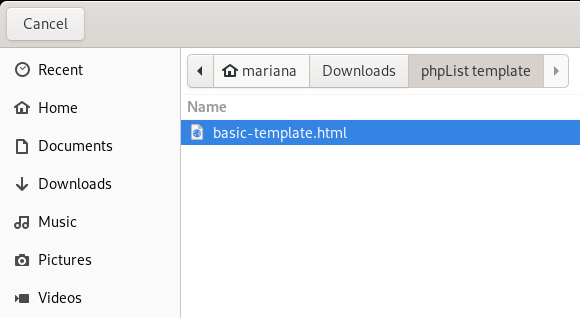
To add your template you can paste the html into the editor, or upload it as a file. In this example we are uploading it.
Click the Browse button, locate the template file on your computer and click Open. The file name will then appear next to the Browse button (as shown in the image above).
Save your template
Scroll to the bottom of the page and click Save changes, using the checking tools if you wish.

Upload your logo?
The next screen gives you an opportunity to upload your template images, if you have any. This will usually be a logo. In this case the logo is hosted remotely and so no image is listed to upload.
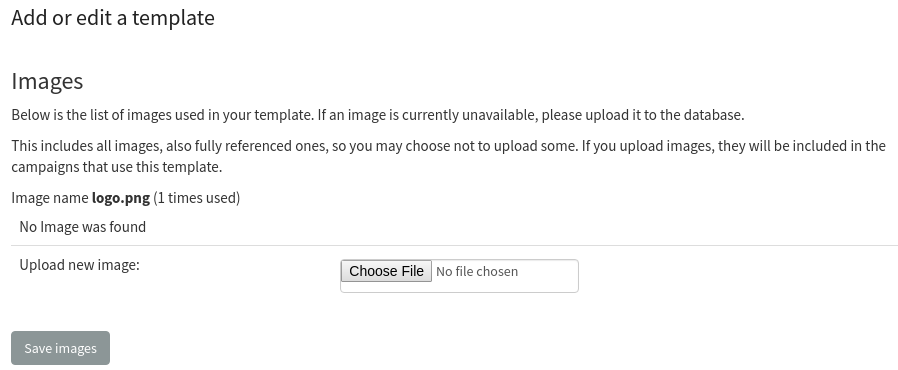
Click Save images.
Your template will now be added to your list of Existing templates.
If you wish to set this template as the default for all campaigns, you can check the button under CAMPAIGN DEFAULT.
Defaults and settings
There are some default settings for templates and footers at Config > Settings under campaign settings. For example you can choose which template will be used by default by referring to its ID.

The ID of the template can be found by hovering your mouse on the template name.
Using your template
During campaign composition, use headings and other formatting as normal. You do not need to apply any additional styling such as text colour, if those elements are dealt with in your template.

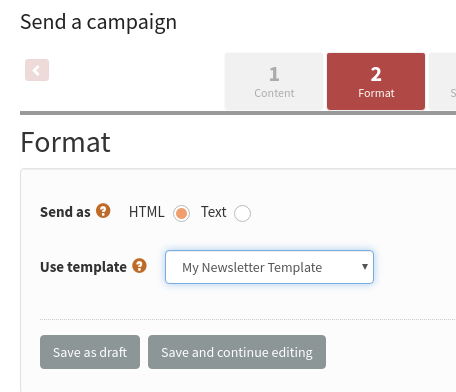
In the Format of the send campaign workflow, select your template from the Use template dropdown.
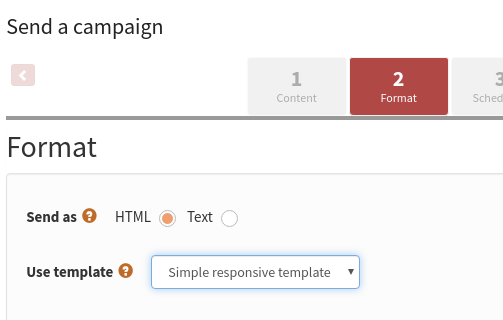
The template and theme are then applied during sending.
Feedback
Discuss this chapter here.
Advanced templating
More template placeholders
This chapter contains additional details that may be useful for a designer who is creating a template for use in phpList.
[SUBJECT]
[SUBJECT] adds the subject of the email within the newsletter text.
[CONTENT] - a mandatory placeholder
This is where the message's content (body) will be inserted. Every template must have a [CONTENT] placeholder.
[SIGNATURE]
[SIGNATURE] prints the phpList image signature.
[FORWARDURL] is replaced with the personalised URL only. To use this, you will need to wrap it in HTML, like this:
<a href="[FORWARDURL]">Forward to a Friend</a>
[PREFERENCESURL]
[PREFERENCESURL] allows the recipient to edit their subscribe preferences, for example update their email or the number of lists they belong to. This essentially allows them to maintain your list up to date for you and is an invaluable feature.
[UNSUBSCRIBEURL] - a mandatory placeholder
[UNSUBSCRIBEURL] allows the recipient to totally unsubscribe from all your lists. In phpList you must include this placeholder somewhere in your body or footer. It is best to use this along side [PREFERENCESURL] if you manage multiple lists, so subscribers can leave just one list rather than all lists if they want.
[DOMAIN]
Prints your domain, e.g. yourdomain.com as listed in your configuration settings.
[EMAIL]
Prints the subscribers email address;
Some older placeholders
These are some older placeholders which still work, but are not recommended for use:
[FORWARD]
[FORWARD] is a link where the recipient can go to “forward this message”. The default text for this placeholder is this link.
For example, if you use "If you want to forward this message to a friend click [FORWARD]", it will come out as:

[UNSUBSCRIBE]
Like Forward the link that subscribers can use to unsubscribe. It will also be replaced with "This Link", which means you can use it like this:
To unsubscribe from our newsletter click [UNSUBSCRIBE]
[PREFERENCES]
Like Forward and Unsubscribe the link that subscribers can use to update their personal details and preferences. It will also be replaced with "This Link", which means you can use it like this:
To change your preferences click [PREFERENCES]
Feedback
Discuss this chapter here.
DIY: Super Simple Template
We have made a very basic template for you to use. You will also need
- A version of your logo or similar image measuring 300px wide.
Download and save the template
Download the template by clicking here and then saving the file to your PC.
Upload the template to phpList
Go to Campaigns > Manage campaign templates.
Click add new template.
Give your template a name, for example My Newsletter Template. Then click Choose File.

Select the file you downloaded earlier, called basic-template.html, from your computer and click Open.
Then click Save Changes.
Upload your logo to phpList
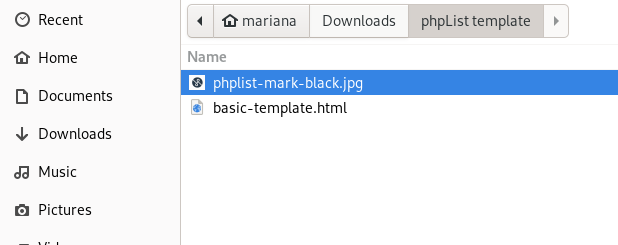
You will then be directed to add your logo. Remember, it must be no more than 300 pixels wide. Click Choose file.
Select your logo file from your computer and click Open.
Click Save Images.
Make the template your default?
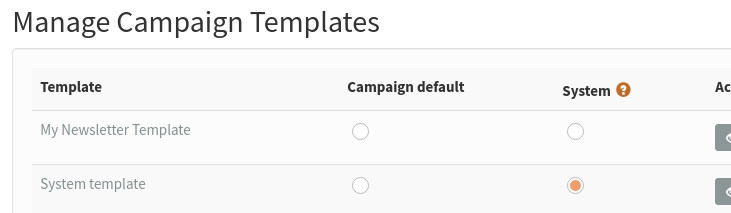
You will see your new template added to your list of existing templates. If you will use this template for most of your campaigns, click the radio button under Campaign Default.
Copy this footer text
<a href="[PREFERENCESURL]" title="Update your preferences">Update your preferences</a> | <a href="[UNSUBSCRIBEURL]" title="Unsubscribe" >Unsubscribe</a>
First go to Config > Settings.
Then scroll down till you find the Campaign Settings area.
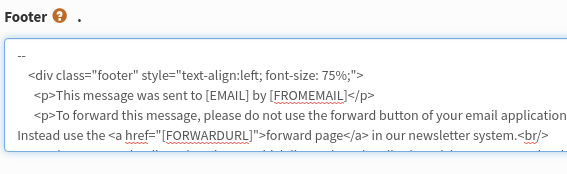
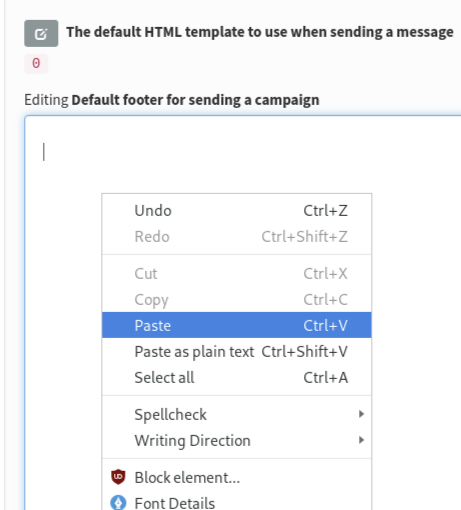
Click the edit icon
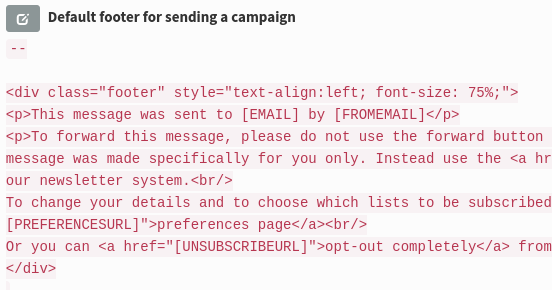
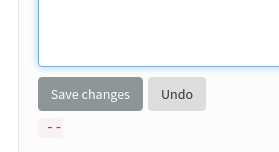
Delete the contents up to the -- and right-click to Paste in the html you copied from this chapter.
Click Save Changes.
Any new campaigns will now use this footer by default.
Using your new template
Compose a new campaign. In this example I have pasted the html from my latest blog.
Check that you are using your template by clicking Next and examining the Format tab.
Send a test message using the Send test box at the bottom of the page.
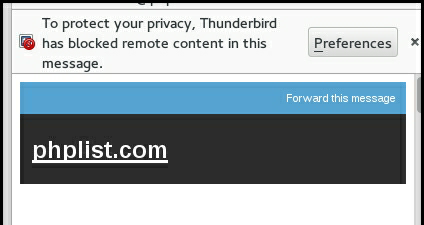
Take a look at the email when it arrives. You will notice your logo displays even when other, remote images are blocked, because phpList has sent it as an attachment.
And you can see your template has been applied,

Feedback
Discuss this chapter here.
Subscribe page design and configuration
Subscribe page is the name of the page where your subscribers can join your lists. You can have as many subscribe pages as you want, and you can make them look like your website.
You can customize your subscribe pages in various ways. You can edit the default design, which will affect all the pages, on your Config > Settings page, and/or you can tweak the design of individual pages using the Header and Footer boxes on the subscribe page editor.
Modifications from within the Config > Settings page
Go to Config > Settings from the main menu, and scroll down to the subscription-ui settings area. Here you can edit the html of the pages, and also a few basic settings.
Modifications from within the subscribe page editor
The Header and Footer boxes in the General Information section of Config > Subscribe Pages > add/edit a page can be used to edit the HTML of an individual subscribe page.
The html in these boxes is generated from the defaults in Config > Settings > subscription-ui settings, which can also be edited (see above).
You don't need to use <HTML> <head> etc, as phpList already includes this for you. However, you can add your own Meta Tags and CSS file links or your own <scripts> just so long as all these extras are above the </head>.
If you create your own CSS styles for your page, save the file outside of the phpList folder structure, for example in the stylesheets directory. Then add a rel link to the new file above the </head> tag. Keeping it outside of the phpList folder structure will make it easier to upgrade later on.
<link rel="stylesheet" href="/styles/customized.css" type="text/css" />
Advanced Customisation
You may wish to heavily customise of your Subscribe page, to make it look like it is part of your website (rather than third party software).
You should use a HTML editor for this task. You create a blank page in your HTML editor, then copy and paste the contents of the Header box and replace the code </head> <body> in the HTML editor with the copied code.
You will need to be careful with exactly how much you paste into the Header box and whatever you do paste must fit within the <TABLE> below the <!-- Top table starts -->
Feedback
Discuss this chapter here.
Advanced Campaign Statistics
This chapter covers
Basic statistics, as found in the Statistics Overview, are covered in the chapter called Basic Campaign Statistics.
The Statistics Menu
To get a basic understanding of what data is available you can work methodically from the top down, first viewing each page, then seeing what links are provided in each page, and onwards. You will often come full circle.
In this chapter we will approach our drilldown from analysing one campaign, covering both opens and clicks. You can also compare multiple campaigns, or focus on a specific URL you are trying to drive traffic to. The approach you take depends on the questions you are trying to answer.
Drilling down into an individual campaign
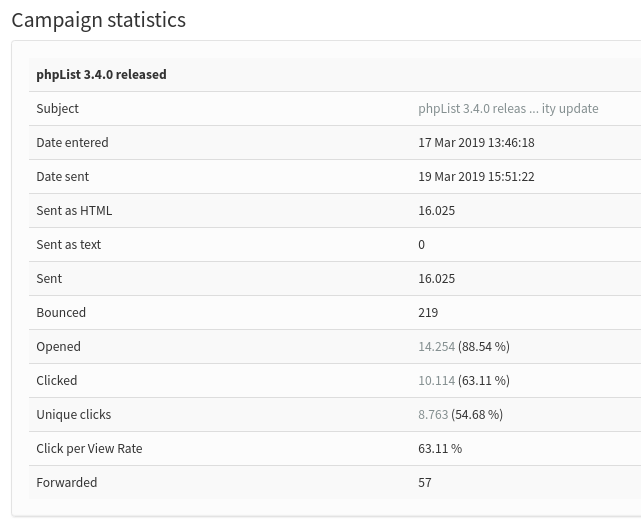
The starting point for an analysis of a single campaign is the campaign statistics overview. This can be found in Campaigns > List of campaigns > Sent Campaigns by clicking on the graph button
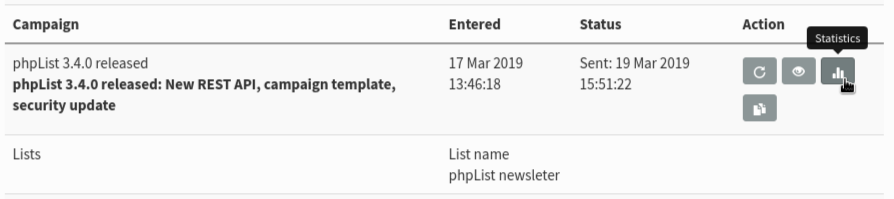
and also by visiting Statistics > Statistics overview and clicking on the name of the campaign.
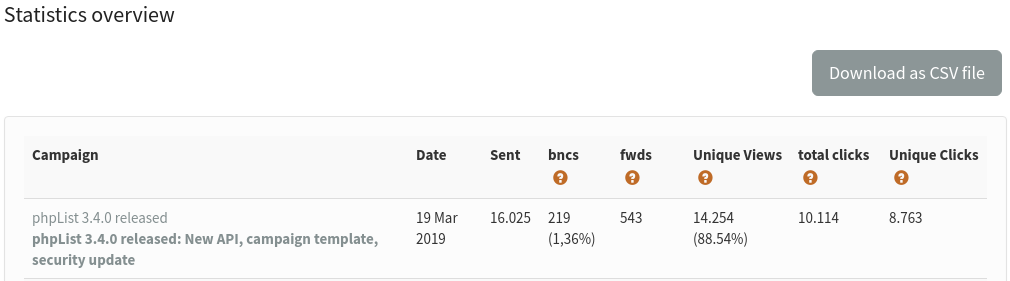
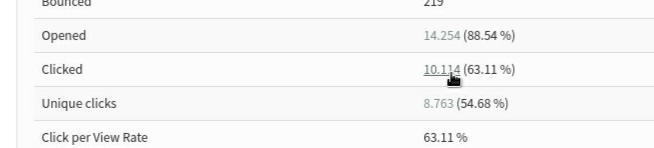
Either of these routes will bring you to the Statistics Overview for a campaign. The page gives you an overview of information and two ways to drilldown are available.
Opened Drilldown
By clicking the number of opens, you can get a a page called Open Statistics.

This page allows you to Download as a CSV file a list of those subscribers who were registered as having opened the campaign (remember this is by no means everyone, only those recorded).
The csv file can in turn be used to create lists of active subscribers, or by using the list-exclude feature you can isolate inactive subscribers too.
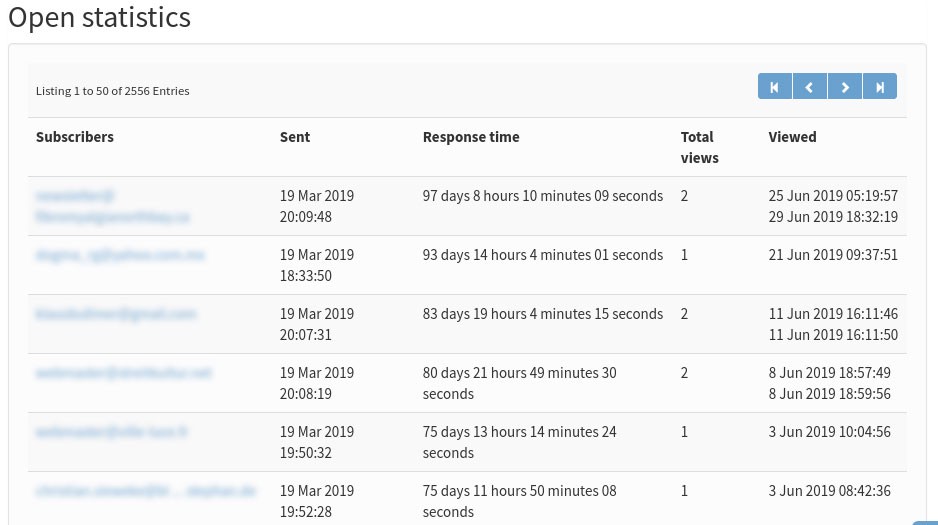
You can also click on an individual subscriber to drilldown to the subscriber level.
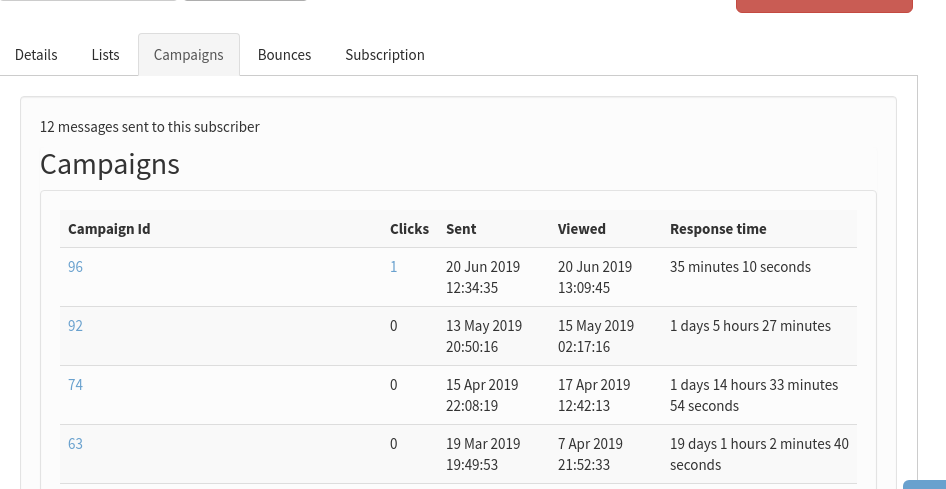
This will take you to the Campaigns tab in the History section of the Subscriber profile, where you can click further links to view the campaigns they have opened (left) or the links they clicked on in that campaign (right).
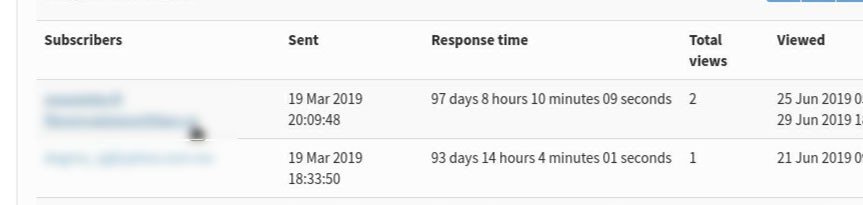
You can also see the date on which they viewed a campaign and the response time (in seconds).
Clicked Drilldown
In your campaign statistics overview page, you can also choose to drilldown into clicks data.
This will take you to a list of the links in that campaign, and how many people clicked on each one.
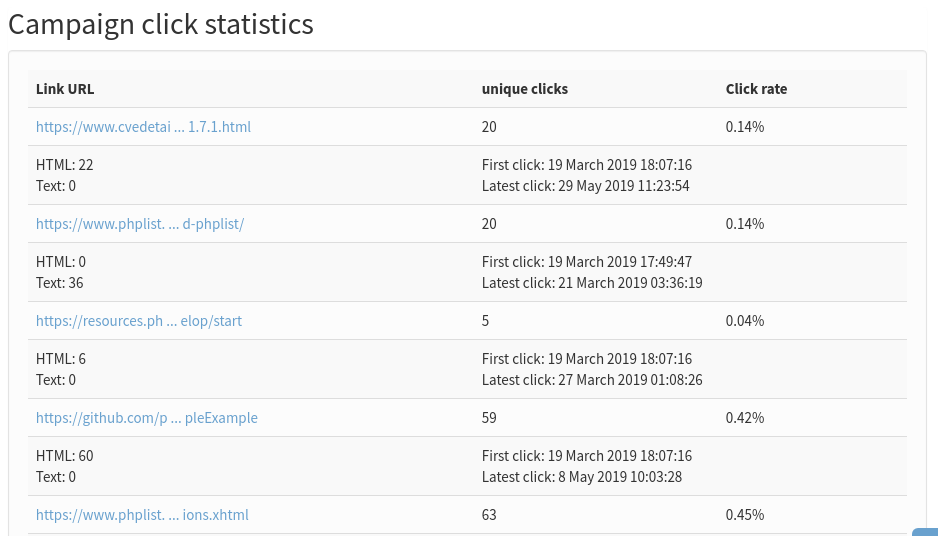
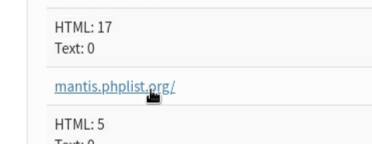
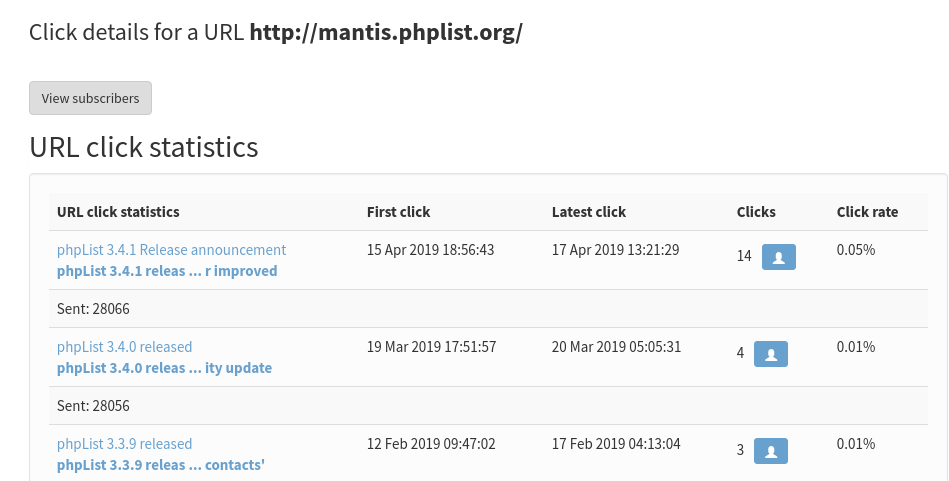
If you click on the url you can see how many people clicked on that url across all campaigns which contained it.
That data can also be downloaded as a csv.
Domain Statistics
The Domain statistics page is accessible from the main statistics menu and it is a fascinating page which can give you a real insight into the nature of your subscribers. The Domain Statistics tab is divided into four tables that each one oven display different typo of information:
-
Top 50 domains with more than 5 subscribers
-
Domains with most unconfirmed subscribers
-
Top 25 local-parts of email addresses
-
Top 25 domains with the highest number of bounces
On the last table each domain links to a new page which shows aggregated performance statistics for each of those records, specifically: bounce rate and view rate. These high-level statistics are useful in diagnosing deliverability issues to particular important mail hosts.
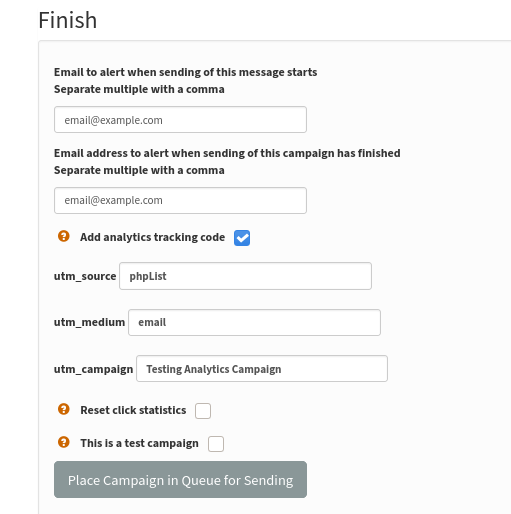
Using an analytics tracking code
Using an Analytics tracking code ensures that any visits to your website from the campaign are recorded.
Matomo Integration is available as an alternative to Google Analytics starting from phpList version 3.5.3. You can choose between Matomo or Google Analytics in the Settings page of your account. Similarly to the current GA parameters, when selected, each URL will have four additional query parameters that will be displayed and can be edited on the Finish tab when composing a campaign. The data is not collected, stored or viewed in phpList.
Google tracking is quite different from the in-built phpList opens/views tracking. Firstly the data is not collected, stored or viewed in phpList. Also, if you link to another website in your campaign and if that website also has Google Analytics tracking on their site (which is likely) then they also receive data. In that sense, the tracking code is not exclusive to you.
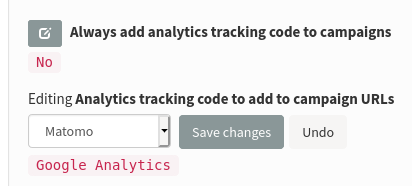
To turn on and off the use of tracking codes for every campaign, use the Always add analytics tracking code to campaigns in your campaign settings area, which can be accessed from Config > Settings. Once you select whether you want to have Analytics tracking for your campaigns you can choose between Matomo and Google Analytics. You can update these settings an anytime.
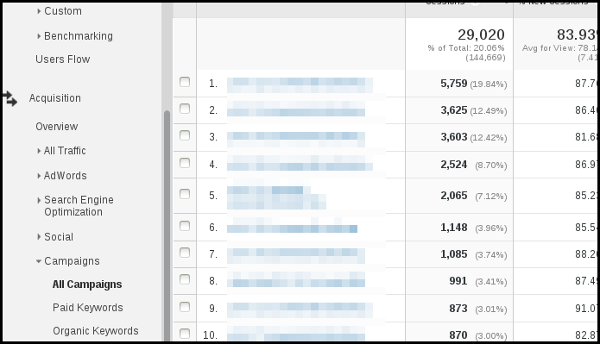
To view the data in your Google Analytics go to Acquisition > Campaigns and you will see the name of each campaign.
Enable/Disable click track
As mentioned above, phpList can tell whether a link included on your campaign has been clicked and how many times has been clicked. For various reasons (for privacy reasons for your subscribers, for example) you might want to have this functionality disabled. Upon installation click track is disabled, but if you wish to enable it you have to edit the config_extended.php file.
Go to:
define('CLICKTRACK', 0);and set this as
define('CLICKTRACK', 1);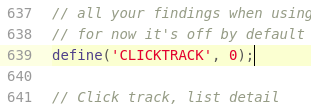
Forward to friend
On your Statistics > Statistics overview page, the third column, FWDS, shows the number of people who have forwarded the mail through the phpList ForwardToFriend system.
This system uses a placeholder to create a link or form in the email body or footer of your campaign for your subscribers to use to forward the mail to someone else.
If your subscribers use this method to forward your campaign, any actions (clicks, forwards etc) taken by the new recipient will be included in your campaign statistics separately.
It is possible for you subscribers to forward the message by other means, but you cannot reliably tell: any clicks or opens in an email which has been forwarded without the Forward to a Friend system will be recorded as actions of the original subscriber.
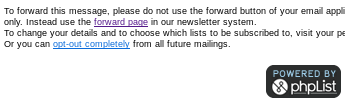
It is therefore worth including an option to forward the campaign, using the [FORWARDURL] placeholder, in the header or footer. For example,
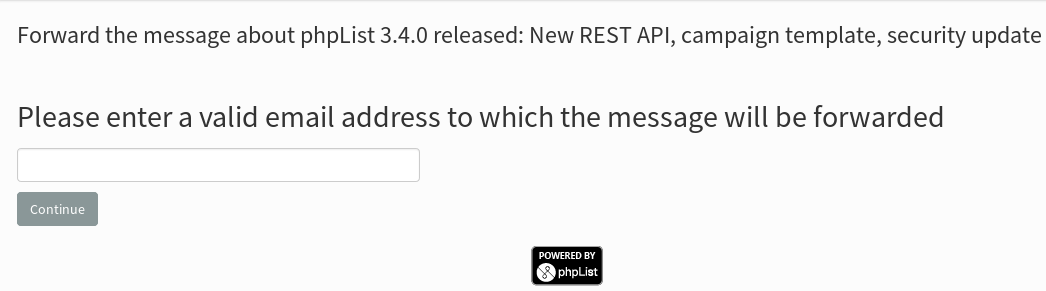
The subscriber will then see a forwarding link in the email footer:
When a subscriber clicks this link they are prompted to enter an email:
 Disable click tracking
As stated above phpList can provide you all this useful information regarding the links that have been clicked from your campaign.
Feedback
Discuss this chapter here.