This is a style guide for phpList documentation. It will help us (the documentation team) keep some key elements of our writing consistent – which will make it more readable.
Summary
For consistency and legibility:
- phpList is always capitalised with a small php, a capital L and small ist: phpList.
- Any words you quote from the phpList software should be spelled and capitalised the same way as they are in the software…
- …and words quoted from the software should be highlighted in bold
- eg: Config > Settings
- Directions in this article for formatting screenshots refer to gimp image editing software
- Images should be 600px wide, contain minimum white-space and only necessary information
- Images should have descriptive file names and alt-text
- Images should have a black 6px wide border
- Arrows used in images should be created and formatted as described in this article
Referring to Words > in Menus >
When quoting words from within the phpList software, for example the name of a page, tab or menu-item, capitalization and spelling should be kept exactly as it appears in the software. Also bold the words that are quoted.
For example if you were wanting to explain the following path:
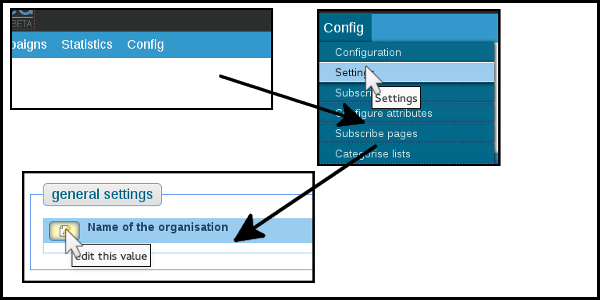
you would write
“Go to Config > Settings and then, under the heading general settings, click the edit icon.”
Screenshots size and arrangement
Screenshots should be no more than 600 pix wide.
We need to show the minimum amount of “white space” (or grey space) and the maximum amount of detail. This usually means you need to re-size the browser window before taking the screenshot.
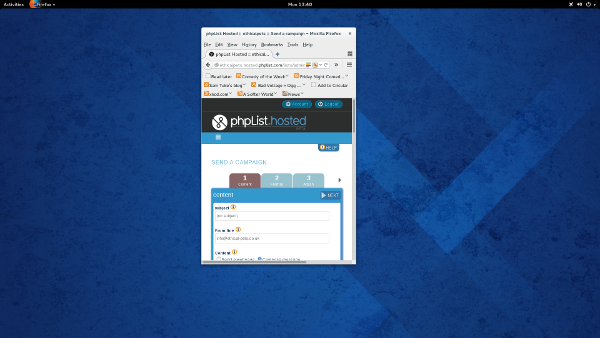
For example, if you want to show users the From line dialogue, a full-screen screenshot, shrunk to 600 pixels wide, would look like this:
it is very hard for the reader to see any details in the image, even with the important area highlighted in red.
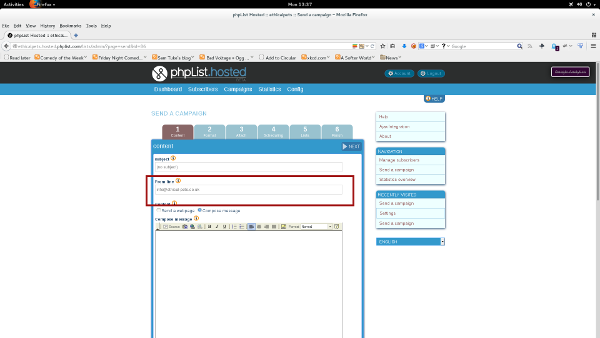
If you re-size your browser (to shrink the contents of the browser window) like so:
Then crop the image in Gimp (or similar image editor) you get this:
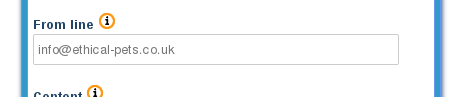
In this screenshot the reader can see all the details they need and so it’s easier to understand the authors instructions.
File names and alternate text
To help search engines index our documentation fully (which will in turn help users find what they are looking for more easily) file names and “alt text” need to describe the image accurately. For example:
Here is a screenshot describing the list selection step of sending a campaign:
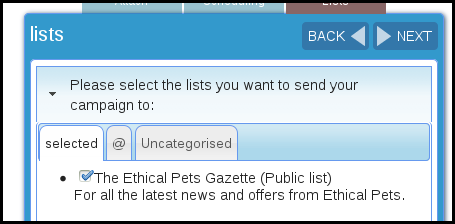
Here it is again:

These images look identical to most of us. But to a search engine (and to those using software to help with various disabilities, such as blindness) they look totally different.
A search engine “sees” the first image as:
<img src=”https://www.phplist.org/wp-content/uploads/2014/07/Screenshot-from-2014-07-14-143402.png” alt=”Screenshot from 2014-07-14 14:34:02“>
This file name (ending .png) was generated by my computer and WordPress has used it as the alt text automatically (but on other software the alt text might simply be blank).
The second image is seen as:
<img src=”https://www.phplist.org/wp-content/uploads/2014/07/choosing_which_list_to_send_to-phplist.png” alt=”choose which list to send your campaign to in phpList“>
This is a file name I chose with care, and alt text which provides a little more detail.
This second example means that users searching for something like “how do I choose which list to send my email to in phpList” are more likely to be shown to our documentation.
Borders
Images should have a 6px black border around them. In GIMP this is achieved by choosing black as the foreground colour and then going Select > All and then Edit > Stroke Selection
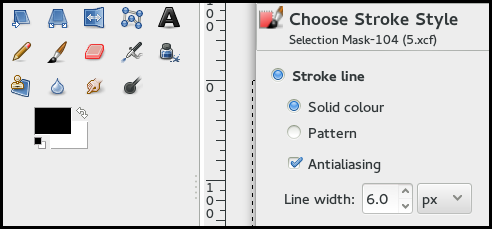
then choose the Stroke line option in the dialogue and set the Line width to 6.0 px.
Highlighting
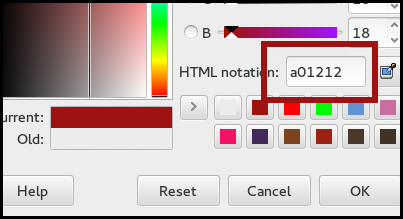
A similar method can be used to highlight a button or area within a screenshot. First set your foreground colour as a01212, then select the area of importance using the select tool.
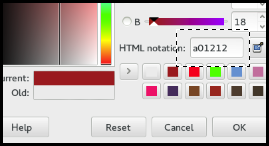
Next use Stroke Selection. The Stroke line will appear in the foreground colour
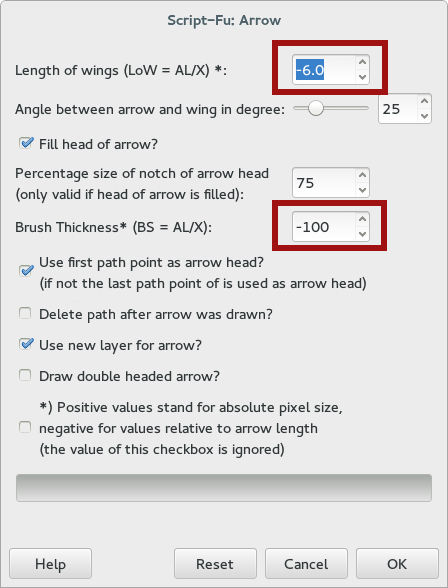
Arrows
If you need to use an arrow (to show, for example, drag and drop) follow the set up instructions here (note the install instructions at the start, they are easy to miss). When you make your first arrow you need to set the dialogue up like this: