Twitter cards have been around for a while, and while exiting improvements in click rates are reported, uptake is still patchy. This blog shows you how to set up a twitter card for your newsletter sign up page, so that when you tweet asking people to join your list, you can do it in style.
Why: get more clicks and re-tweets, so you can grow list faster
How long: 30 mins
To skip to the essentials click here
What is a twitter card?
This is an average tweet asking for people to sign up to my mailing list.

It’s okay… there is no image, and also, the link will take the user away from twitter, so they will only click it if they are excited by it enough.
This is a similar tweet, but it’s made with twitter cards enabled on my phpList Subscribe Page

It’s much better! Once the View Summary link at the bottom of the tweet is clicked, a lot more information is revealed. It’s attractive and visual, there is a succinct preview and a little more to interact with too, for example, the View on web link below. Twitter users like these cards because they can see all this extra stuff, making them more sure whether the tweet is of interest to them, without having to to leave Twitter at all. This makes them more likely to take an action suggested in your tweet (like join your list!)
The general process(es) of setting up twitter cards
The process changes a little depending on the situation.
If you are setting up Twitter cards for a blog or web-shop where there are lots of posts or products and regular new information, then it is best to use a plugin. In that case the general process would be:
- Install plugin (for example the Add Meta Tags plugin for WordPress)
- Verify site for use with Twitter Cards on Twitter Card Validator
- Let the plugin do the rest of the work, just tweet as normal
- Unless you want to add specific info into the card, in which case use the tool provided by your plugin.
If you are setting up Twitter cards for a single, static page like your phpList subscribe page, then the following method is best:
- Create your card using the Twitter Card Validator
- Add the meta tags generated by the Validator to your page
- Verify the site for use with Twitter Cards
- Tweet as normal from then on
Have you enabled twitter cards already?
Twitter cards are verified by domain name, so even if you have enabled them on your website or blog, they won’t necessarily be enabled for your phpList subscribe page.
For example, I set up twitter cards for my store at www.ethical-pets.co.uk a while ago, however, my mailing list subscribe page is http://ethicalpets.hosted.phplist.com/lists/?p=subscribe&id=2 – the page is on a totally different domain name. Therefore, I need to enable cards and validate for my phpList domain too.
How to enable twitter cards on your phpList subscribe page (12 steps)
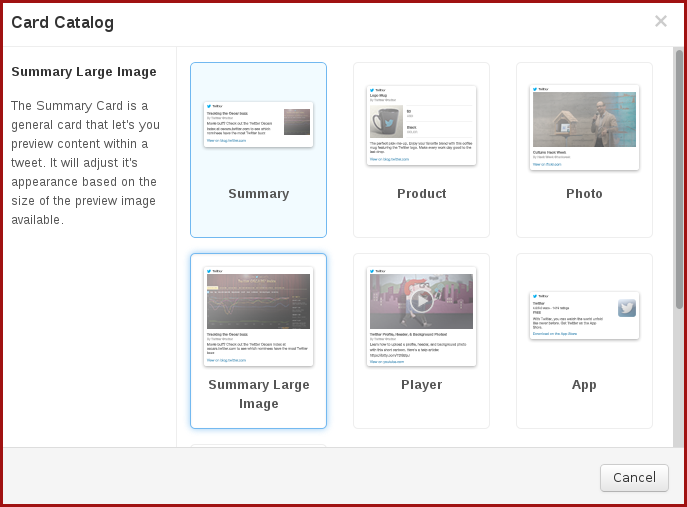
1) Go to the Twitter Card Validator and choose your card type. In this instance I have chose Summary Large Image
2) Next, fill our the Try Cards tag to create your card. For example, you can add a summary of the page and an image (using the image url).
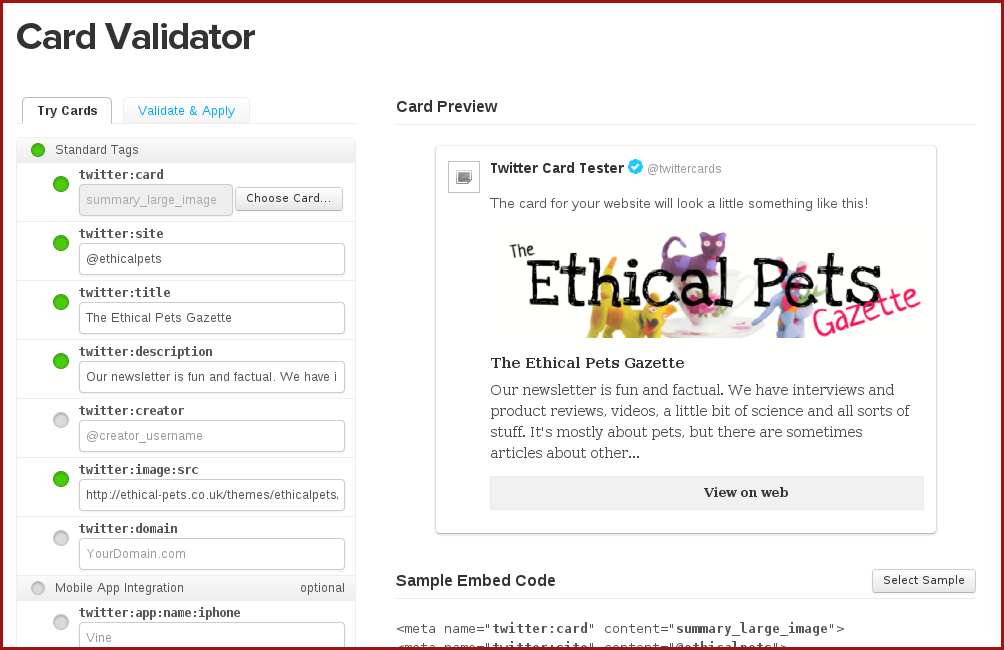
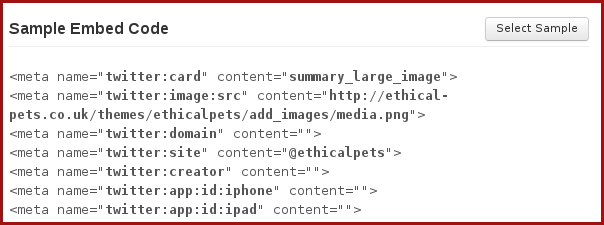
3) When your card is ready, use the Select Sample button to select the Embed Code, and copy the text.
4) Now, go to your phpList install or hosted account. In the main menu, go Config > Subscribe Pages

5) Find the list you wish to make the twitter card for, and click the Edit icon.

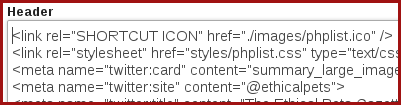
6) Paste your Twitter Card embed code into the Header area.

Make sure that you have pasted before the </head> close tag.
7) Click the Save Changes button at the bottom.
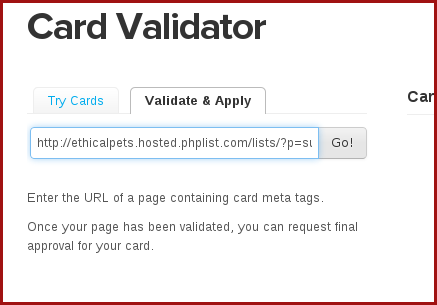
8) Next click on the View icon (like a magnifying glass) to view your subscribe page. Copy the url.
![]()
9) Go bask to Twitter Card Validator and paste your url into the the Validate and Apply tab. Click Go!
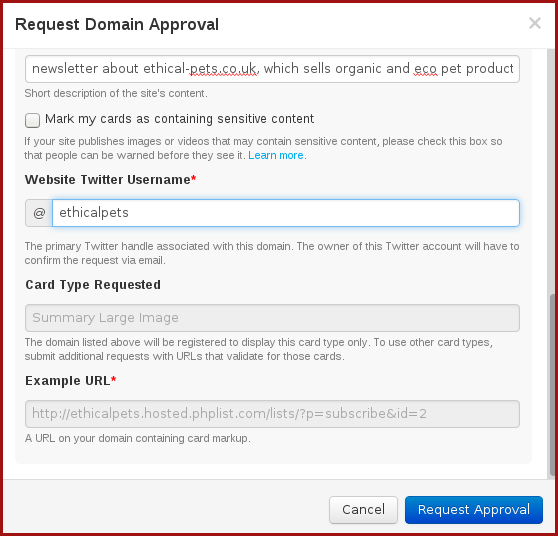
10) Fill out the validation request form and click Request Approval
11) There is a pop-up message which says wait a few weeks, but it’s usually done in just a few minutes. You could use this time to prepare your next tweet! Click the Refresh button to check the status.

12) When the “light” turns green, you are ready to use your twitter cards.

How to use twitter cards
In this case, you just tweet as usual, and the data you entered in the Card Validator forms the basis of the card, as show below:
If you want to make a card for another of your lists, then repeat steps 1-7 (there is no need to validate again.