A cool new feature in phpList 3.2.2 allows the upload of a logo to the main settings page. The logo can then be inserted into campaign templates using the new [LOGO] placeholder: this system helps you change the logo across all templates in one go, with just a few clicks. Read on to find out how to use it.
Add your logo
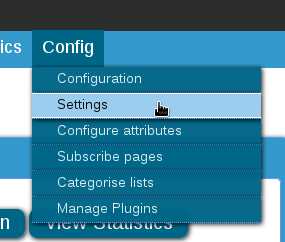
First click Config > Settings.
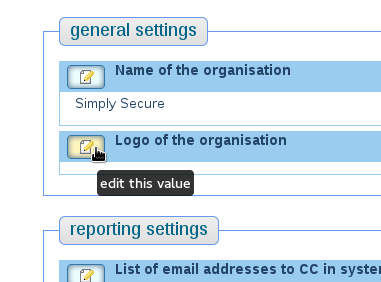
Next, click the edit icon.
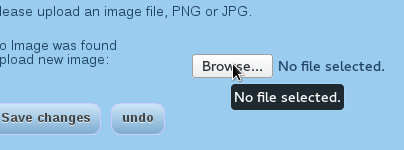
Then click to Browse for your logo.
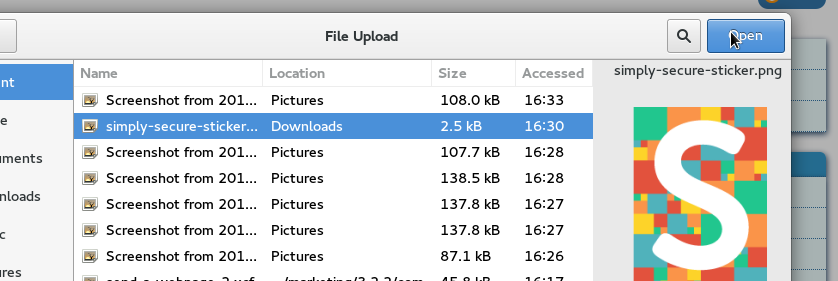
Select your logo file, a .jpg or .png is best. Click Open/Upload.
Then click Save changes.
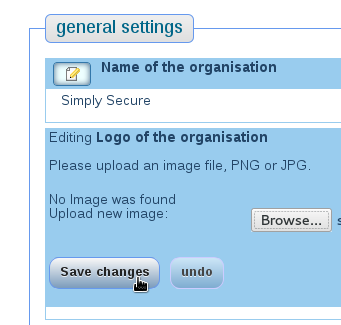
Tada! You have uploaded your logo!
![]()
Using your logo in a template
Creating a template
Once you have uploaded your logo, you can use it in templates and the content of your campaigns. You need PHP5.4 or up.
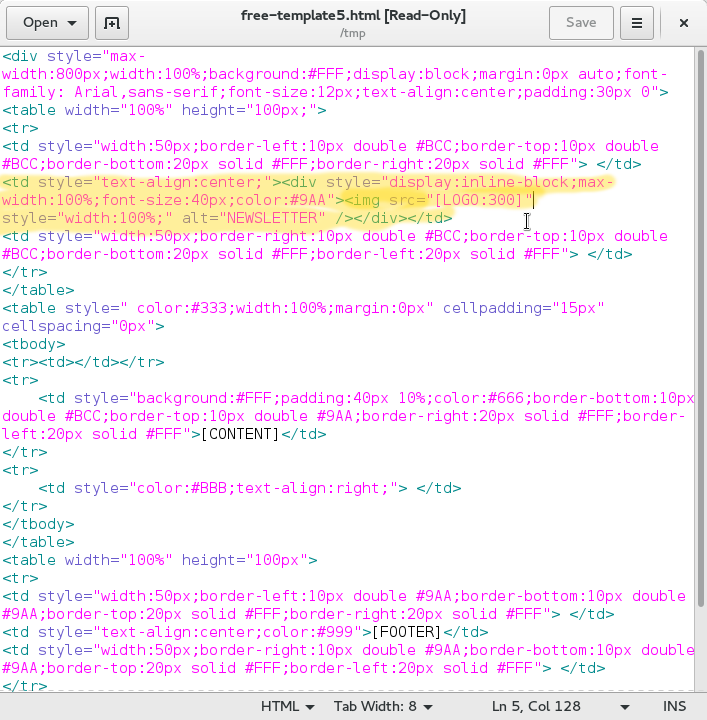
You can add the logo into templates using the [LOGO] placeholder, for example:
<img src="[LOGO]" alt="*" />
will use the logo exactly as it is. Additionally you can specify the maximum longest side size, which will scale the logo keeping the aspect ratio, by using the following method:
<img src="[LOGO:300]" alt="*" />
You can specify the exact dimensions like so:
<img src="[LOGO]" width="X" height="Y" alt="*" />
General instructions for creating phpList templates can be found in the manual here: an overview of templating in phpList can be found here.
Using the template
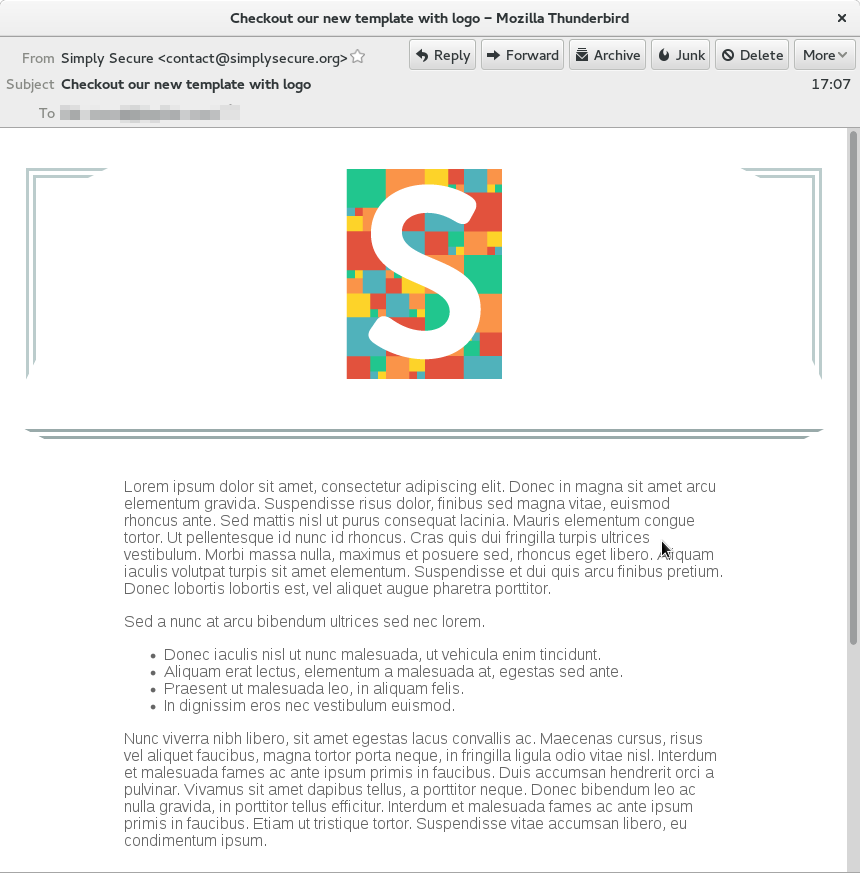
The html above looks like this without the logo:

After sending, the logo appears as below, with the logo inserted automatically:
If you want to change the logo, you don’t need to edit the template again, you can simply upload a new logo to the Config > Settings page.
Super cool just what is was looking for. Thanks