Scheduling
In the campaign workflow you will find the scheduling tab.
If you want to send a campaign straight away, and there is no need to stop sending before a specific time, then you can leave these details unchanged and your campaign will simply send.
If your needs are more complex, read on.
Important information
Scheduling settings interact with your sending method. If you are only able to process your queue from within the browser because you have no cron or command-line access, then the embargo time feature will not work for you. To send a campaign from the browser you must always open your browser to process the queue and keep it open until you have finished, even if you have used an embargo time.
Scheduling tab
Below is an image of the scheduling tab. We we will work though it from top to bottom:
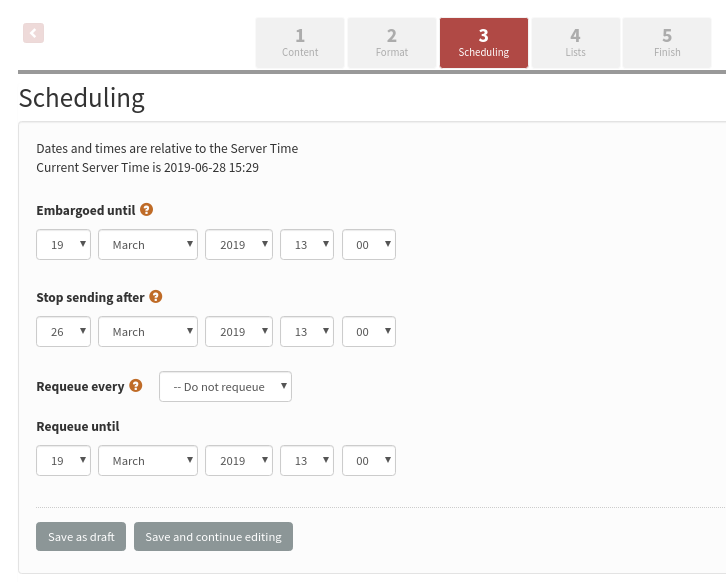
Server time
The server time may not be the same as your local time. All of the times in the scheduling page are relative to server time. Changing this time is an advanced feature.
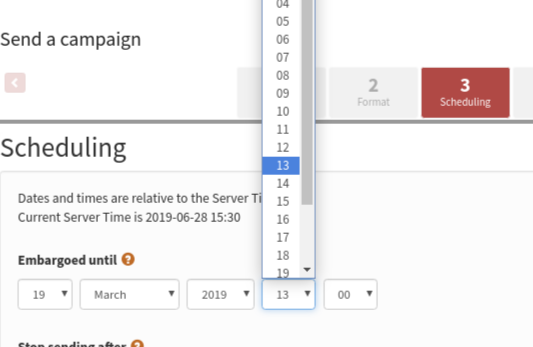
Embargoed until
The campaign will not be sent until this time has passed. If you have a campaign which you wish to send at a later date, perhaps when you out of the office or away from your desk, then this is the feature you should use.
Embargo time is initially set to the nearest hour before you started your new campaign: this effectively switches off the embargo feature by default. To use the feature you must set the time in the future. Simply set the date and time to the time you want to send, relative to your server time which is stated above. Then place the campaign in the queue as normal. If you are using a cron job then the campaign will automatically start sending at the desired time.
Stop Sending After
This feature is used when the topic of a campaign is time sensitive, for example, a special offer with an expiration date or an event with a specific time. If the campaign would become irrelevant to anyone who received it after a particular time, then this is the feature you should use.
The primary use of this feature is when your list size exceeds your sending capacity within the timeframe you need to send your campaign in. For example, if you have a list of 10,000 subscribers and can send 1000 emails in an hour but the campaign becomes irrelevant in 8 hours time, you need to stop sending before everyone on your list has received a copy of the mail.
Re-Queue
The re-queue setting is used to send a campaign to subscribers who join a list after the campaign is sent. Remember, a campaign will never be sent to the same subscriber twice.
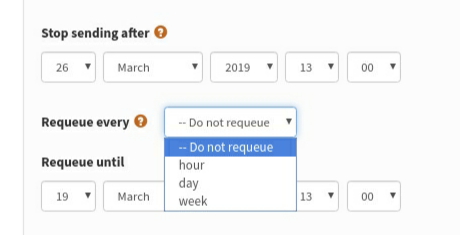
As an example, you create a monthly newsletter on the first of January, and send it to a list. Over the month you expect another 50 people to sign up, or be added to your list manually, and you would also like them to automatically receive a copy of the campaign. You would set up your campaign to re-queue every day and to re-queue until 31st of January.
Feedback
Discuss this chapter here.